From a Dev.to post:
Create a new directory: First we need to create a directory somewhere to store our workspace.
Create a workspace.dsl file: Next we need to create a file called workspace.dsl inside that directory, with the following content.
workspace {
model {
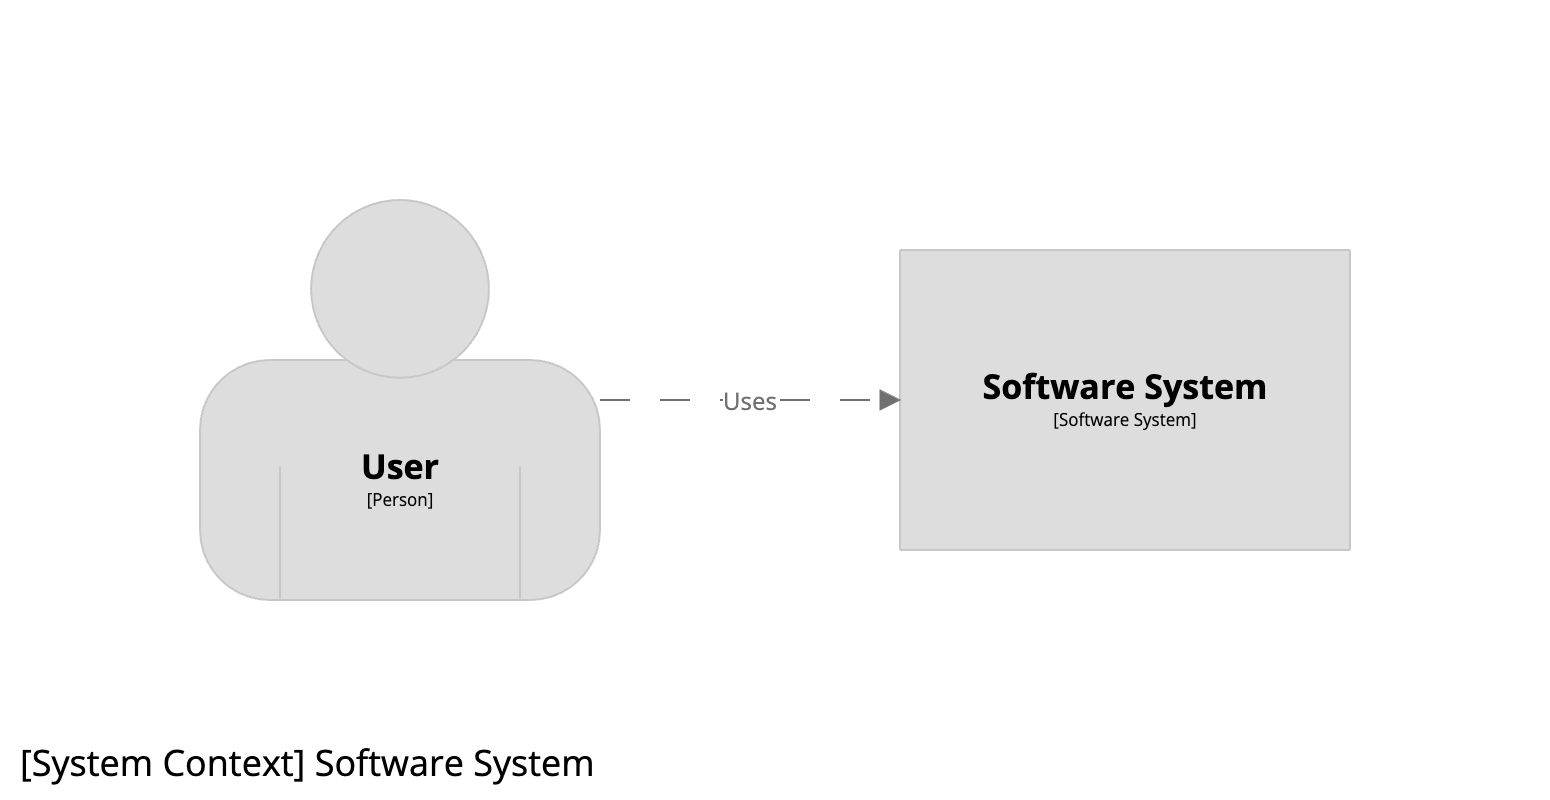
user = person "User"
softwareSystem = softwareSystem "Software System"
user -> softwareSystem "Uses"
}
views {
systemContext softwareSystem "Diagram1" {
include *
autoLayout
}
theme default
}
}
and
You can find more about the Structurizr DSL at https://github.com/structurizr/dsl, but essentially this DSL file says:
* Create a model with a user and a software system, where the user uses the software system.
* Create a system context view for the software system, adding the default set of elements, using auto-layout.
* Use the default theme for styling elements and relationships.
docker pull structurizr/lite
docker run -it --rm -p 8080:8080 -v PATH:/usr/local/structurizr structurizr/lite
Be sure to replace PATH with the full path to the directory created in step 1. For example, if the directory is located at /Users/alice/structurizr, the commands would be:
docker pull structurizr/lite
docker run -it --rm -p 8080:8080 -v /Users/alice/structurizr:/usr/local/structurizr structurizr/lite
View the diagram: Open the workspace in a web browser by heading to http://localhost:8080 and you should see your diagram. If you make a change to the DSL file and save it, you should see that change immediately reflected when you refresh your web browser.
Add some documentation: Let's add some documentation to describe our software system. To do this, create a subdirectory named docs and create a file named 01-context.md inside that subdirectory, with the following content:
## Context
Here is a description of my software system...

Now change the content of the workspace.dsl file to be as follows (notice the addition of the !docs line):
workspace {

    model {
        user = person "User"
        softwareSystem = softwareSystem "Software System" {
            !docs docs
        }

        user -> softwareSystem "Uses"
    }

    views {
        systemContext softwareSystem "Diagram1" {
            include *
            autoLayout
        }

        theme default
    }

}
Save all files, refresh your web browser, and click on the top-left button with the icon that looks like a book. You should now see the Markdown documentation page that we just created, which itself is embedding our existing system context diagram.
Last modified 06 July 2026